


I turned an HPI RS4 Sport 3 into a formidable rally car (so you don't have to)
 04-25-2024, 06:54 AM
#1
Junior Member
Thread Starter
Video
Intro
The primary purpose of this post is that, against my better judgement, I converted this on-road 1/10th touring car platform into a formidable mixed-surface demon, which I wanted to share with the community. While the end result turned out great, it's been one heck of a journey, and I can't in all honesty recommend it for a beginner. There is not great parts support to begin with, but I think an even bigger challenge was simply that there is not a lot of institutional knowledge out there online about this particular platform-- what aftermarket parts are and are not compatible, for example. This resulted in a LOT of trial and error. Which leads me to the other reason for this post-- to help document the things I learned along the way such that the next person who goes searching online might be able to avoid some of the pitfalls I experienced throughout the build. I would also say even if you�re not interested in a rally build, but simply want to understand this car better, or maybe you already have one and are looking for some recommendations on upgrades or longevity-- you should still find this article helpful given how little info there is to be found out there.
Chassis
I started with the HPI RS4 Sport 3 �Creator Edition� chassis. The Creator Edition is no different than their various RTRs, it simply doesn�t come with electronics, wheels, or a body-- allowing you to choose your parts rather than go with what HPI delivers factory. It comes pre-assembled, but as with anything that comes pre-assembled, I�d recommend giving it a once-over with your tools to make sure screws are nice and tight, and parts that are supposed to move freely don�t have any binding. Mine was issue-free, but I've seen a number of videos online where people experienced shoddy quality control out of the box.
The chassis itself is well-designed and laid out. There�s not a gratuitous amount of screws to get to crucial parts, the steering and wheel alignment linkages are very simple and not over-engineered, there is plenty of space for standard electronics and various battery sizes, etc. The main drive shaft can be accessed from both top and bottom which makes swapping out gears and bearings a breeze. That said, one easy recommendation I can make is that if you�re going to be doing any off-road running, placing some masking/ painters/ duct tape along the bottom of the chassis will help keep fine dust and dirt out of your drivetrain, which is advertised as �sealed�, but in practice, I would say �covered� is a more accurate description�it�s not 100% water-tight or anything, just not wide-open either.
Of all of the OEM chassis parts, I haven�t had any issues with quality except for two: 1) The plastic spur gear, and 2) the aluminum motor mount. In the spur gear�s defense, the main problem is really just that it�s not well suited for a brushless motor and LiPo batteries�it�s simply too soft. If you�re running brushed or maybe only on-road only, it�ll probably hold up for a little while, but I definitely recommend upgrading to metal which is covered in more detail below. As for the motor-mount, the OEM aluminum quality is not very good in my experience�it�s also too soft, which generally results in the mount not holding the motor steady, which means your mesh might often come unaligned and/or you may strip some gears if not replaced. This is also covered below.
Suspension
For my use-case I definitely needed to beef up the shock situation in order to handle gravel, shallow jumps, uneven tarmac, etc. I tried a few different products over time, but what ended up �sticking� have been 60mm Yeah Racing big bore shocks which will want bigger (5.5mm) threaded ball studs than stock in order to install. These offer more travel than the 50mm stock shocks, and have thicker shock shafts for added durability. I�m running mine on the softest springs, and . I have tried every combination of oil and spring from 20WT to 60WT, and at least for off-road use, a soft spring with thicker oil has given me the best handling and stability.
Speed and Power!
From square one I�ve been running my build with the following core components:
Motor � Castle Creations 1410 3800kv sensored, brushless motor
ESC � Castle Creations Copperhead 10
Battery � 2S and 3S LiPo, 5000mAh, 50C
As mentioned above, the stock plastic spur gear absolutely cannot handle this. I also tried Kimbrough plastic gears, which require a different spur mount, and they don�t survive either. After searching far and wide, I�ve come to the conclusion that at the time of this posting, the one design-fit metal option on the market worth your time and money is this one from SpeedTek RC. I have ordered and tried, no joke, nine other metal spur options from across trusted hobby shops, Amazon, and AliExpress�and they always are either slightly off, straight-up need heavy modification and tooling to be able to fit, or were terrible quality. Trust me on this one, I spent a lot of time and effort on spur gears�learn from my experimentation and save your money!
And again, as mentioned above, the stock motor mount gave me so many issues. I�ve tried, had success with, and can recommend both this one from GPM, and this one from Powerhobby.
The final comment I would make about this setup is that 3S is�unusably fast. As in, if you�re not running on an air strip or trying to set a PB speed record, you will seldom find yourself charging the 3S, instead opting for 2S. When the 3S pack I bought for this build eventually kicks the bucket one day�I will not be replacing. 1/10th scale cars are just too narrow to be able to keep it going straight, and using that much power off-road is just going to result in broken or melted parts.
Off-road Enhancements
Chassis Weather Protection
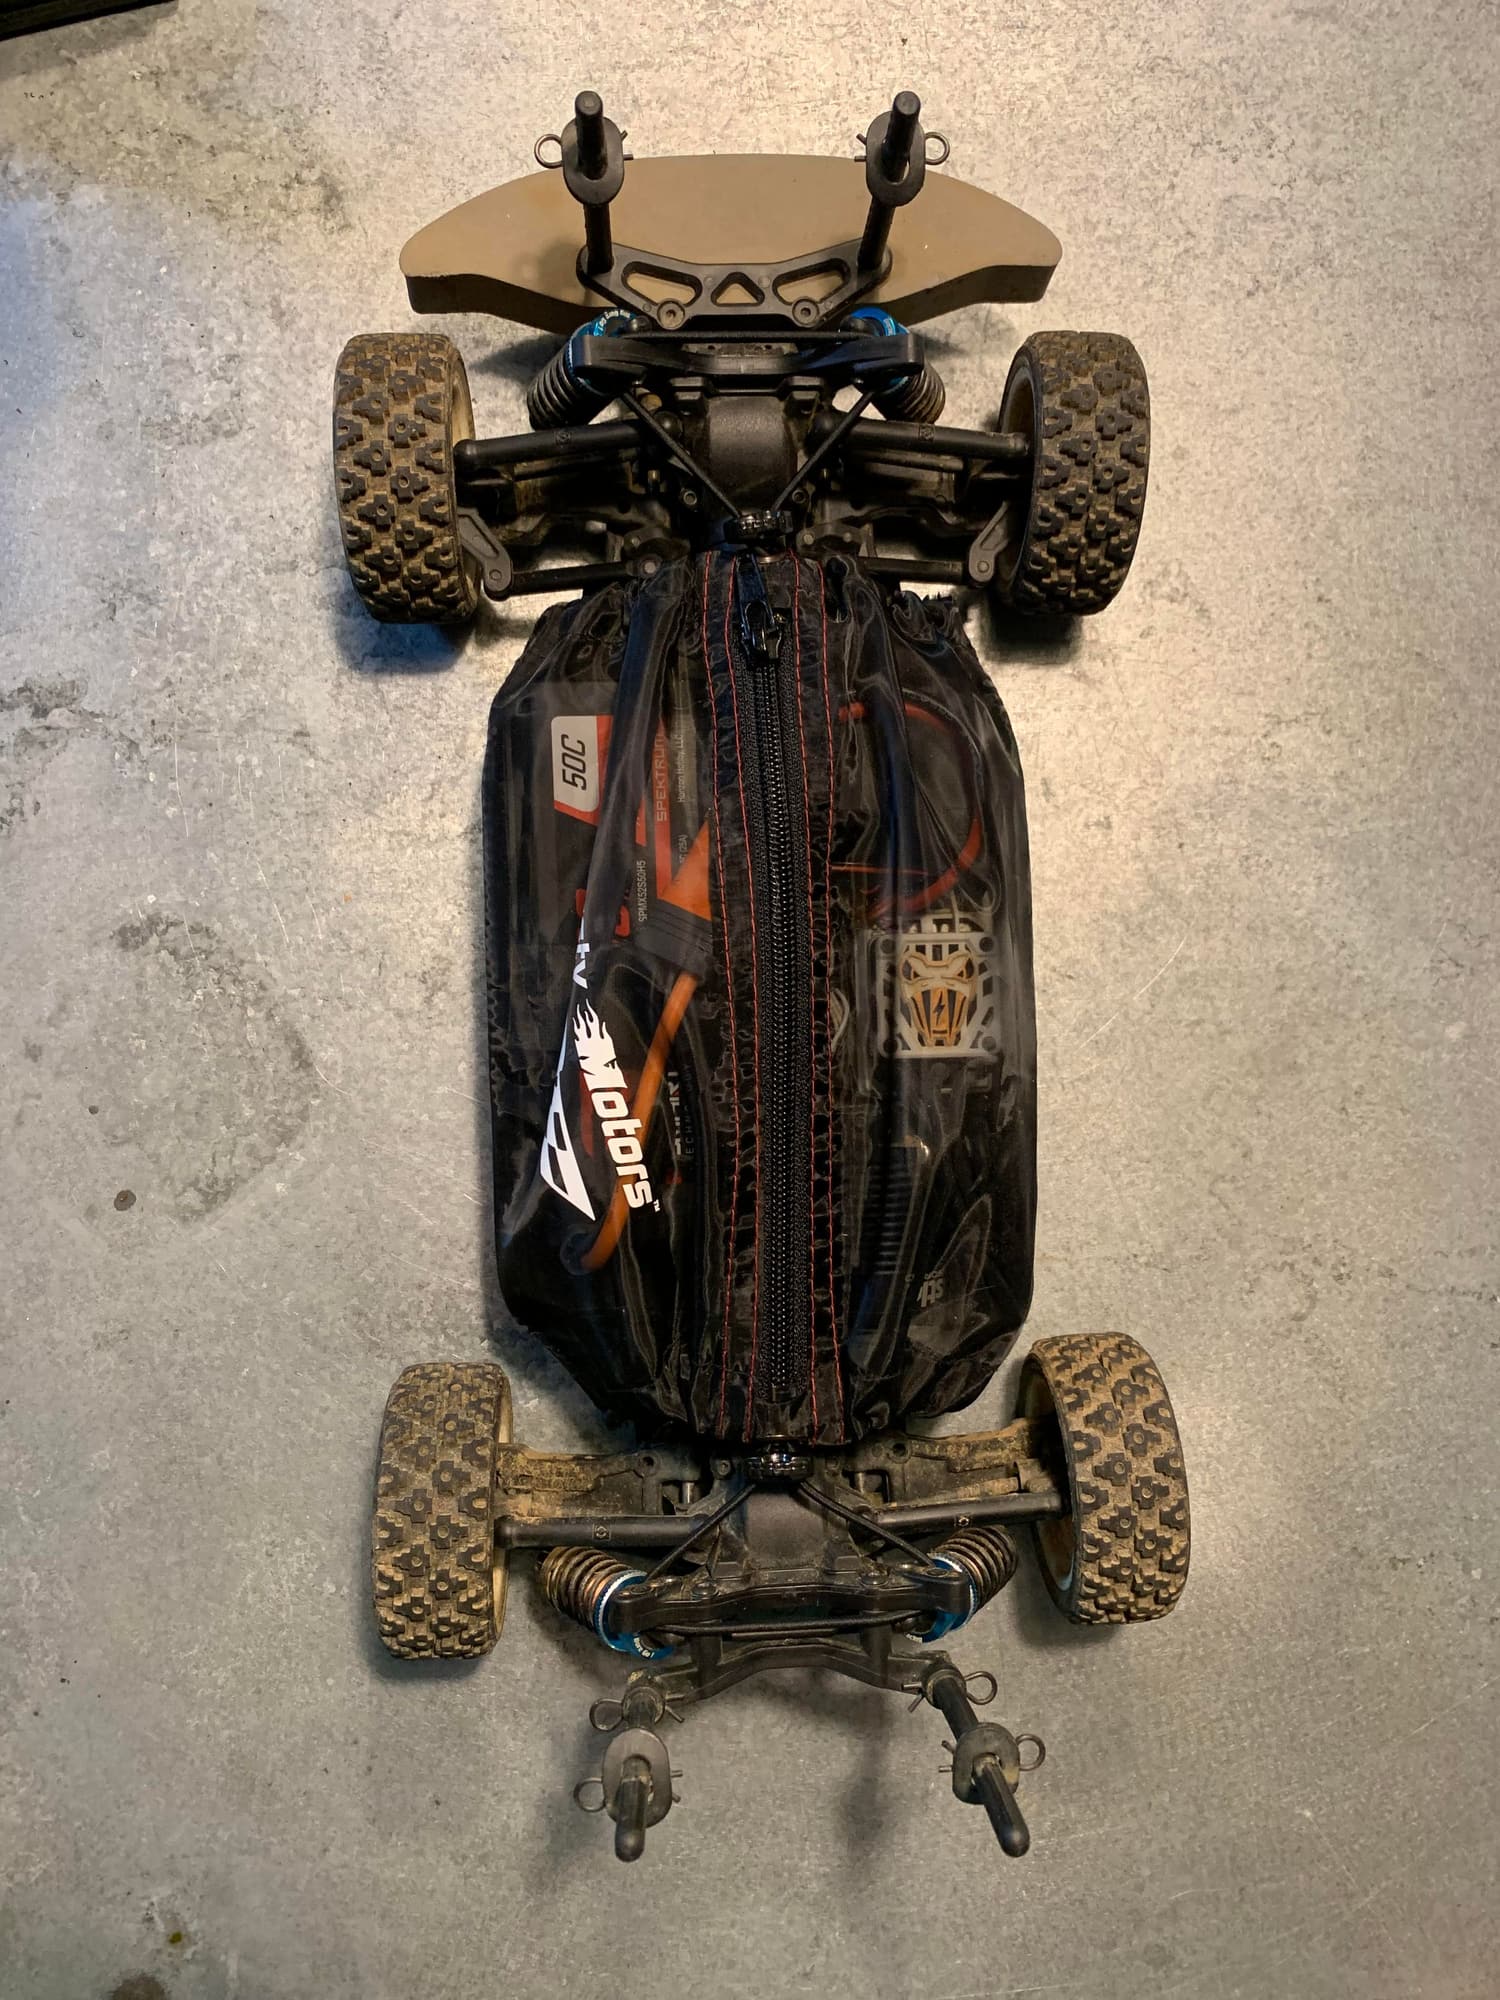
Being a touring car chassis at heart, the chassis is quite shallow, and other than the drivetrain being covered, there�s no OEM dust cover/ chassis protection available from HPI. I experimented with a number of DIY options, but ultimately have stuck with a chassis �shroud� from DustyMotors.com, size �S�. All you have to do is cut some sticky Velcro tape and affix it to either side of the chassis edge, which takes all of 3 minutes, and you�re ready to run. This has been an absolute life-saver for running in mud, snow, and gravel.
Steering
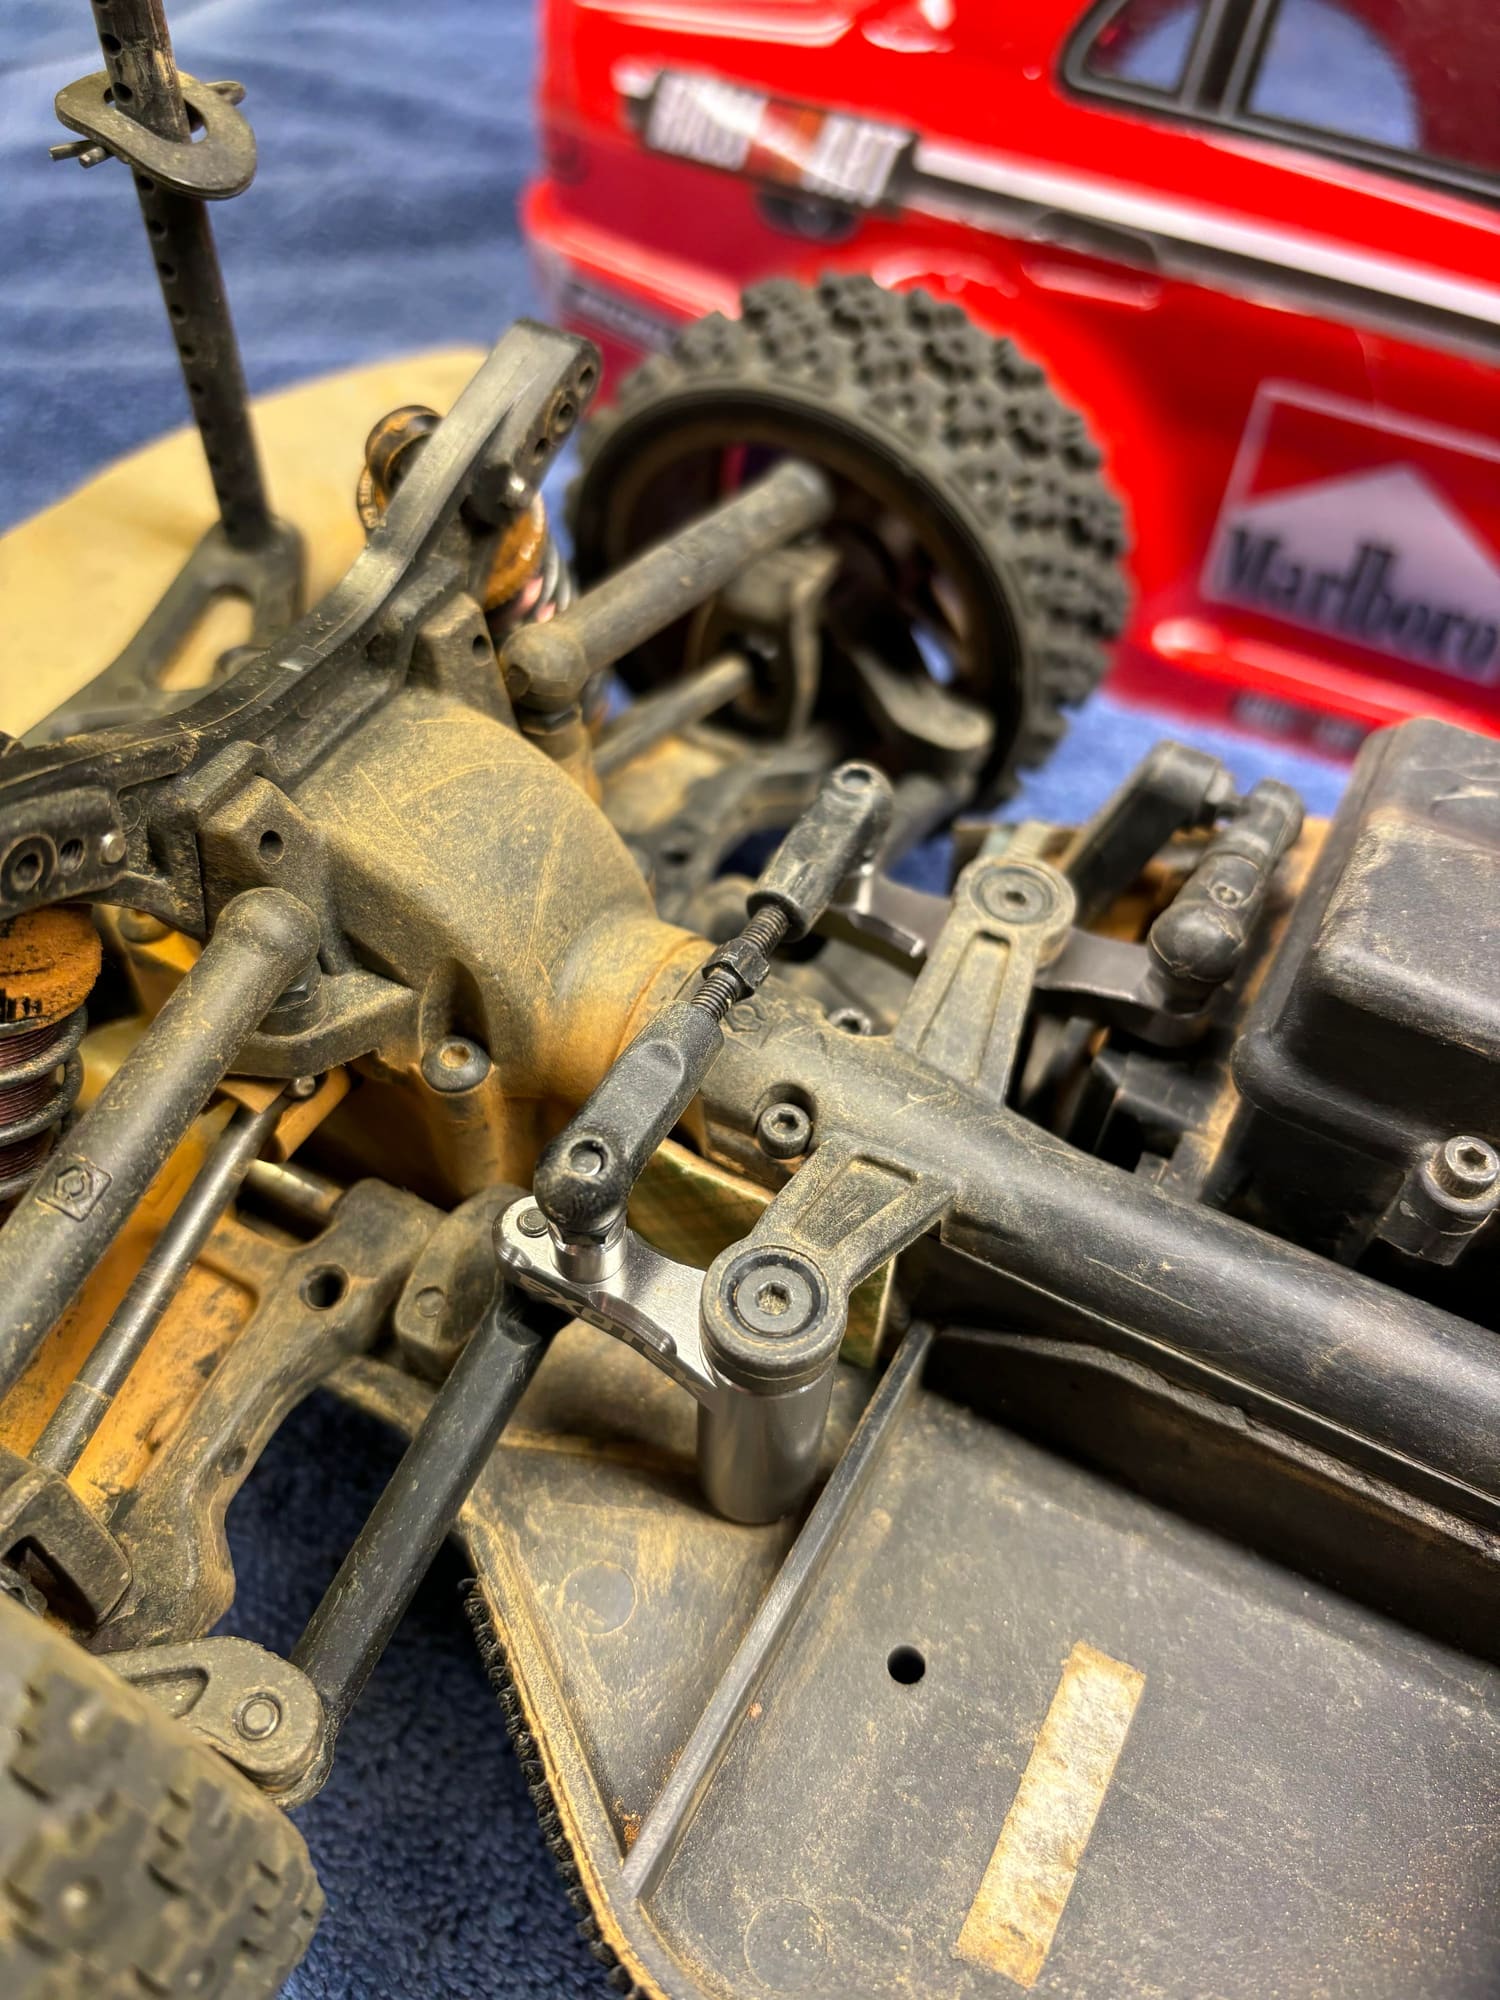
The stock steering design is not conducive to off-road application. Even with the above chassis cover, I still was getting small pebbles that would work their way into the space between the steering servo horn and the chassis bottom, and freeze up all the linkages. Do yourself a favor and pick up this aftermarket set from Exotek RC, which routes the linkages up and over the driveshaft, and alleviates this common problem. Now that said, one issue I did have with this set is that the solid link which crosses over the top of the driveshaft needs to be screwed down tightly in order for said screws to not rattle loose. However, if you do so, it prevents the linkages from moving freely, and puts a ton of strain on your steering servo. I�m not sure why they designed it that way or how it passed their testing prior to release, but the simple work-around solution I found was to simply replace that one fixed-length metal bar with an adjustable turnbuckle instead. Using ball studs means that not only can the linkages move freely, but also, even if a screw does come loose, it will stay in its ball socket, as opposed to leaving the chat entirely for you to never find ever again on whatever surface you�re running on. The added bonus of this modification is that you can adjust the turnbuckle to give your ride customized wheel toe-in or toe-out. Here's a picture of what it looks like installed, which you can compare to the images on the Exotek website (and, excuse the dirt...it's a rally car remember!):
Tires
I tried four different off-road-marketed 26mm tires and have found Tamiya�s rally block tires to not only last the longest, but provide the best traction and handling. Can recommend! Only tangentially related but I will take this opportunity to note: the first wheels I purchased to fill said Tamiya tires were also Tamiya in make, and they actually didn�t work for this chassis. The spokes inside the wheel physically impacted with the steering geometry and knuckle. I bought HPI wheels next, which obviously work given it�s an HPI chassis but�I haven�t had a chance (or desire, if I�m honest) to try out other wheels from different manufacturers yet.
Other/ Misc.
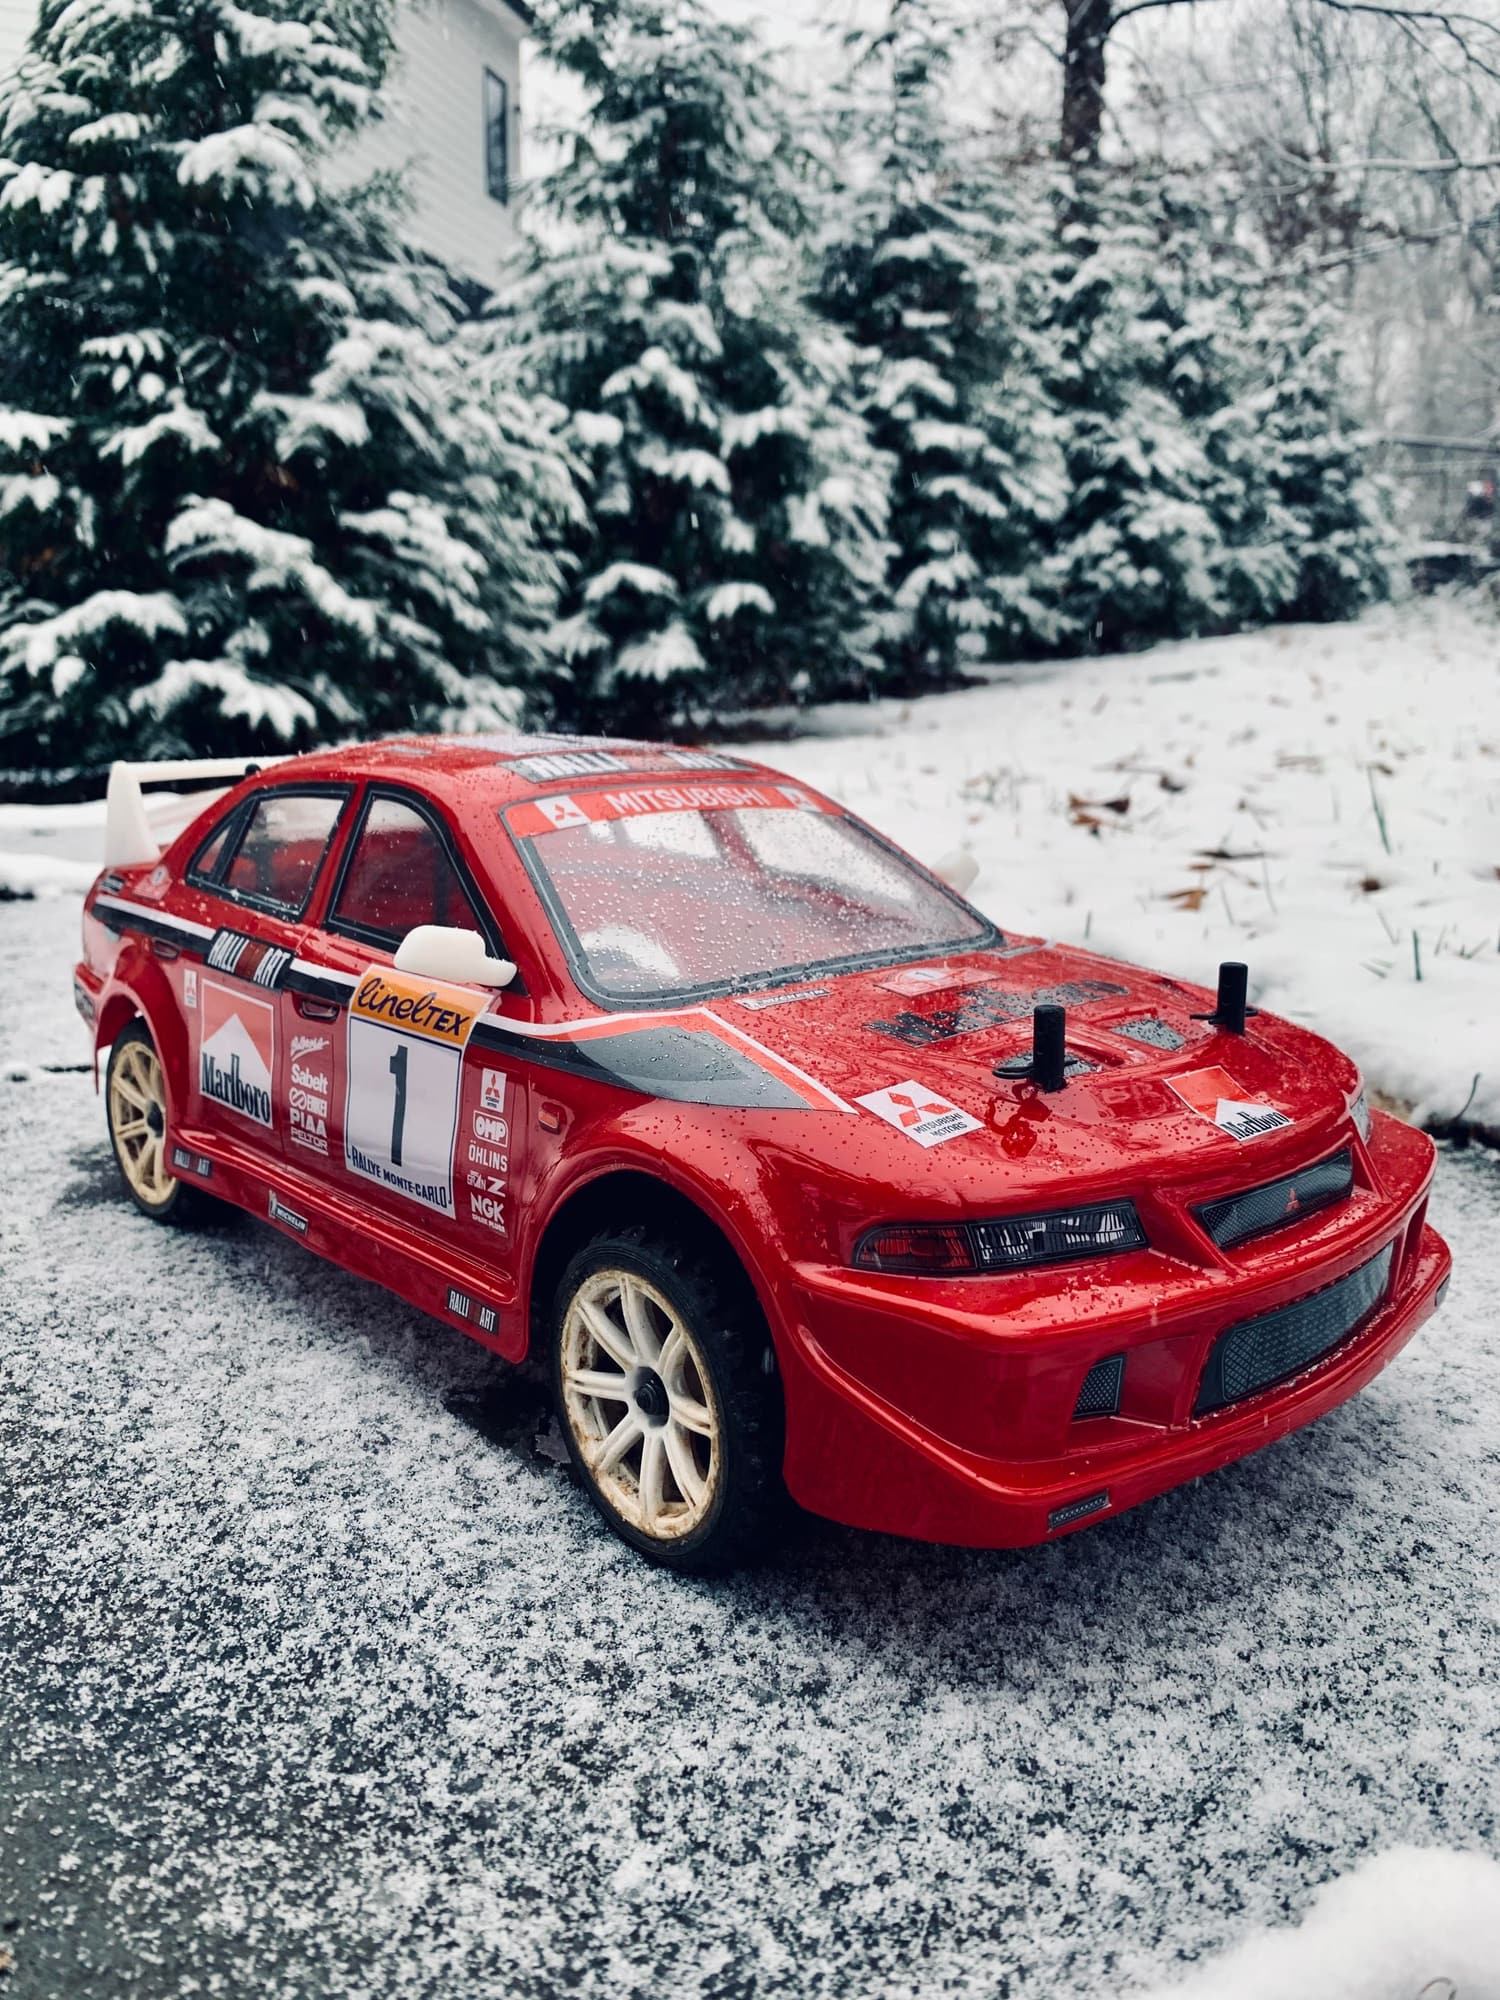
Given the long-travel shocks, you�ll need to set your body of choice quite high up on the body posts, else the body will hit the ground before the shocks are fully compressed. This gives it a comically stilted appearance when on the shelf, but once you�re out running it doesn�t look so weird eating up all the dips and bumps with ease.
I didn�t mention my steering servo, transmitter, nor receiver choices because I don�t think they really matter. The steering servo and receiver mounting options are standard sizes for 1/10th. Obviously recommend getting a servo that is waterproof and has metal gears if you�re going to run off-road and in realistic rally weather conditions (snow, mud, rain, etc.).
Conclusion
I think that�s the extent of the knowledge I wanted to share about this car. Knowing what I know now, I�d say it�s absolutely possible to make the HPI RS4 Sport 3 a rally car, but especially if you�re a beginner, it�s going to be easier to look at purpose-marketed options like the Tamiya XV-02 or Kyosho Fazer Mk2 FZ02-R. I would consider the high-clearance steering linkage kit to be an essential upgrade regardless of where you like to run yours. Similarly I would say upgrading to the aftermarket motor mount, and hardened steel spur, are "musts".
If you have a mod for this car you have tried from experience and like, definitely leave a comment below. I�d love to see what others are doing, even if it�s not a rally build specifically. And obviously I�m open to answering any questions or providing more detailed instructions about anything if you have one of these cars today and need help with an issue.

Intro
The primary purpose of this post is that, against my better judgement, I converted this on-road 1/10th touring car platform into a formidable mixed-surface demon, which I wanted to share with the community. While the end result turned out great, it's been one heck of a journey, and I can't in all honesty recommend it for a beginner. There is not great parts support to begin with, but I think an even bigger challenge was simply that there is not a lot of institutional knowledge out there online about this particular platform-- what aftermarket parts are and are not compatible, for example. This resulted in a LOT of trial and error. Which leads me to the other reason for this post-- to help document the things I learned along the way such that the next person who goes searching online might be able to avoid some of the pitfalls I experienced throughout the build. I would also say even if you�re not interested in a rally build, but simply want to understand this car better, or maybe you already have one and are looking for some recommendations on upgrades or longevity-- you should still find this article helpful given how little info there is to be found out there.
Chassis
I started with the HPI RS4 Sport 3 �Creator Edition� chassis. The Creator Edition is no different than their various RTRs, it simply doesn�t come with electronics, wheels, or a body-- allowing you to choose your parts rather than go with what HPI delivers factory. It comes pre-assembled, but as with anything that comes pre-assembled, I�d recommend giving it a once-over with your tools to make sure screws are nice and tight, and parts that are supposed to move freely don�t have any binding. Mine was issue-free, but I've seen a number of videos online where people experienced shoddy quality control out of the box.
The chassis itself is well-designed and laid out. There�s not a gratuitous amount of screws to get to crucial parts, the steering and wheel alignment linkages are very simple and not over-engineered, there is plenty of space for standard electronics and various battery sizes, etc. The main drive shaft can be accessed from both top and bottom which makes swapping out gears and bearings a breeze. That said, one easy recommendation I can make is that if you�re going to be doing any off-road running, placing some masking/ painters/ duct tape along the bottom of the chassis will help keep fine dust and dirt out of your drivetrain, which is advertised as �sealed�, but in practice, I would say �covered� is a more accurate description�it�s not 100% water-tight or anything, just not wide-open either.
Of all of the OEM chassis parts, I haven�t had any issues with quality except for two: 1) The plastic spur gear, and 2) the aluminum motor mount. In the spur gear�s defense, the main problem is really just that it�s not well suited for a brushless motor and LiPo batteries�it�s simply too soft. If you�re running brushed or maybe only on-road only, it�ll probably hold up for a little while, but I definitely recommend upgrading to metal which is covered in more detail below. As for the motor-mount, the OEM aluminum quality is not very good in my experience�it�s also too soft, which generally results in the mount not holding the motor steady, which means your mesh might often come unaligned and/or you may strip some gears if not replaced. This is also covered below.
Suspension
For my use-case I definitely needed to beef up the shock situation in order to handle gravel, shallow jumps, uneven tarmac, etc. I tried a few different products over time, but what ended up �sticking� have been 60mm Yeah Racing big bore shocks which will want bigger (5.5mm) threaded ball studs than stock in order to install. These offer more travel than the 50mm stock shocks, and have thicker shock shafts for added durability. I�m running mine on the softest springs, and . I have tried every combination of oil and spring from 20WT to 60WT, and at least for off-road use, a soft spring with thicker oil has given me the best handling and stability.
Speed and Power!
From square one I�ve been running my build with the following core components:
Motor � Castle Creations 1410 3800kv sensored, brushless motor
ESC � Castle Creations Copperhead 10
Battery � 2S and 3S LiPo, 5000mAh, 50C
As mentioned above, the stock plastic spur gear absolutely cannot handle this. I also tried Kimbrough plastic gears, which require a different spur mount, and they don�t survive either. After searching far and wide, I�ve come to the conclusion that at the time of this posting, the one design-fit metal option on the market worth your time and money is this one from SpeedTek RC. I have ordered and tried, no joke, nine other metal spur options from across trusted hobby shops, Amazon, and AliExpress�and they always are either slightly off, straight-up need heavy modification and tooling to be able to fit, or were terrible quality. Trust me on this one, I spent a lot of time and effort on spur gears�learn from my experimentation and save your money!
And again, as mentioned above, the stock motor mount gave me so many issues. I�ve tried, had success with, and can recommend both this one from GPM, and this one from Powerhobby.
The final comment I would make about this setup is that 3S is�unusably fast. As in, if you�re not running on an air strip or trying to set a PB speed record, you will seldom find yourself charging the 3S, instead opting for 2S. When the 3S pack I bought for this build eventually kicks the bucket one day�I will not be replacing. 1/10th scale cars are just too narrow to be able to keep it going straight, and using that much power off-road is just going to result in broken or melted parts.
Off-road Enhancements
Chassis Weather Protection
Being a touring car chassis at heart, the chassis is quite shallow, and other than the drivetrain being covered, there�s no OEM dust cover/ chassis protection available from HPI. I experimented with a number of DIY options, but ultimately have stuck with a chassis �shroud� from DustyMotors.com, size �S�. All you have to do is cut some sticky Velcro tape and affix it to either side of the chassis edge, which takes all of 3 minutes, and you�re ready to run. This has been an absolute life-saver for running in mud, snow, and gravel.
Steering
The stock steering design is not conducive to off-road application. Even with the above chassis cover, I still was getting small pebbles that would work their way into the space between the steering servo horn and the chassis bottom, and freeze up all the linkages. Do yourself a favor and pick up this aftermarket set from Exotek RC, which routes the linkages up and over the driveshaft, and alleviates this common problem. Now that said, one issue I did have with this set is that the solid link which crosses over the top of the driveshaft needs to be screwed down tightly in order for said screws to not rattle loose. However, if you do so, it prevents the linkages from moving freely, and puts a ton of strain on your steering servo. I�m not sure why they designed it that way or how it passed their testing prior to release, but the simple work-around solution I found was to simply replace that one fixed-length metal bar with an adjustable turnbuckle instead. Using ball studs means that not only can the linkages move freely, but also, even if a screw does come loose, it will stay in its ball socket, as opposed to leaving the chat entirely for you to never find ever again on whatever surface you�re running on. The added bonus of this modification is that you can adjust the turnbuckle to give your ride customized wheel toe-in or toe-out. Here's a picture of what it looks like installed, which you can compare to the images on the Exotek website (and, excuse the dirt...it's a rally car remember!):
Tires
I tried four different off-road-marketed 26mm tires and have found Tamiya�s rally block tires to not only last the longest, but provide the best traction and handling. Can recommend! Only tangentially related but I will take this opportunity to note: the first wheels I purchased to fill said Tamiya tires were also Tamiya in make, and they actually didn�t work for this chassis. The spokes inside the wheel physically impacted with the steering geometry and knuckle. I bought HPI wheels next, which obviously work given it�s an HPI chassis but�I haven�t had a chance (or desire, if I�m honest) to try out other wheels from different manufacturers yet.
Other/ Misc.
Given the long-travel shocks, you�ll need to set your body of choice quite high up on the body posts, else the body will hit the ground before the shocks are fully compressed. This gives it a comically stilted appearance when on the shelf, but once you�re out running it doesn�t look so weird eating up all the dips and bumps with ease.
I didn�t mention my steering servo, transmitter, nor receiver choices because I don�t think they really matter. The steering servo and receiver mounting options are standard sizes for 1/10th. Obviously recommend getting a servo that is waterproof and has metal gears if you�re going to run off-road and in realistic rally weather conditions (snow, mud, rain, etc.).
Conclusion
I think that�s the extent of the knowledge I wanted to share about this car. Knowing what I know now, I�d say it�s absolutely possible to make the HPI RS4 Sport 3 a rally car, but especially if you�re a beginner, it�s going to be easier to look at purpose-marketed options like the Tamiya XV-02 or Kyosho Fazer Mk2 FZ02-R. I would consider the high-clearance steering linkage kit to be an essential upgrade regardless of where you like to run yours. Similarly I would say upgrading to the aftermarket motor mount, and hardened steel spur, are "musts".
If you have a mod for this car you have tried from experience and like, definitely leave a comment below. I�d love to see what others are doing, even if it�s not a rally build specifically. And obviously I�m open to answering any questions or providing more detailed instructions about anything if you have one of these cars today and need help with an issue.

The following users liked this post:
RustyUs (04-27-2024)
